多語言 & 側邊欄
AI生成摘要
本文介紹了如何在 VitePress 中設置多語言支持和自動生成側邊欄。首先,配置多語言資料夾和文件,然後在 config.mts 中設置語言選項。接著,安裝並配置 vitepress-sidebar 插件來自動生成側邊欄,並通過修改 CSS 來實現子項目的縮排效果。
多語言設定
配置資料夾與文件
參考官方文件的配置,我設定了三種語言
- 繁體中文 (root)
- 英文
- 日文
docs/
├─ en/
│  ├─ foo.md
├─ jp/
│  ├─ foo.md
├─ foo.md
設定config
在docs/.vitepress/config.mts加入設定
typescript
export default defineConfig({
  // ...
  locales: {
    root: {
      lang: "zh-TW",
      label: "繁體中文",
      themeConfig: {
        nav: [
          { text: "Home", link: "/" },
          { text: "Notes", link: "/notes/vitepress", activeMatch: "^/notes" },
        ],
      },
    },
    en: {
      lang: "en-US",
      label: "English",
      themeConfig: {
        nav: [
          { text: "Home", link: "/en" },
          { text: "Notes", link: "/en/notes/vitepress", activeMatch: "^/en/notes" },
        ],
      },
    },
    jp: {
      lang: "ja-JP",
      label: "日本語",
      themeConfig: {
        nav: [
          { text: "Home", link: "/jp" },
          { text: "Notes", link: "/jp/notes/vitepress", activeMatch: "^/jp/notes" },
        ],
      },
    },
  },
  // ...
})
側邊欄設定
雖然也能像官方文件一樣手動設定Sidebar的路徑, 但每次增加修改文件都要手動同步有點不太現實,因此我選擇交給自動生成。
安裝VitePress Sidebar
bash
npm i -D vitepress-sidebar設定config
一樣在docs/.vitepress/config.mts加入設定
typescript
import type { DefaultTheme, UserConfig } from "vitepress"
import { defineConfig } from "vitepress"
import { withSidebar } from "vitepress-sidebar"

const vitePressConfigs = {
  title: "miksinote",
  // ...
} satisfies UserConfig<DefaultTheme.Config>

export default defineConfig(withSidebar(vitePressConfigs, [{
  documentRootPath: "/docs",
  scanStartPath: "notes",
  resolvePath: "/notes/",
  useTitleFromFileHeading: true,
  useFolderLinkFromIndexFile: true,
  useFolderTitleFromIndexFile: true,
}, {
  documentRootPath: "/docs",
  scanStartPath: "/en/notes",
  resolvePath: "/en/notes/",
  basePath: "/",
  useTitleFromFileHeading: true,
  useFolderLinkFromIndexFile: true,
  useFolderTitleFromIndexFile: true,
}, {
  documentRootPath: "/docs",
  scanStartPath: "/jp/notes",
  resolvePath: "/jp/notes/",
  basePath: "/",
  useTitleFromFileHeading: true,
  useFolderLinkFromIndexFile: true,
  useFolderTitleFromIndexFile: true,
}]))使用了withSidebar並分別對三種語言做了設定,其中resolvePath和basePath比較重要。 我也考不太清楚運作方式,總之試誤出一個正確運作的設定方式。
重開dev server後可以看到側邊欄正確顯示了!
bash
npm run docs:dev可以試著切換語言看看是否正確運作
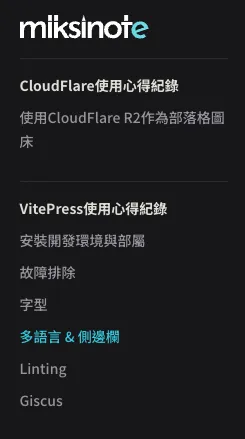
設定css
側邊欄是顯示了,但有個問題,主項目和子項目在同一個階層。 我希望子項目可以縮排,就像這樣:
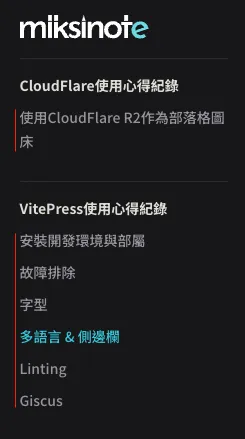
所幸官方文件有提供修改方式
在docs/.vitepress/theme/style.css中加入設定
css
/**
 * Component: Sidebar
 * -------------------------------------------------------------------------- */
.group .VPSidebarItem.level-0 .items {
  padding-left: 16px !important;
  border-left: 1px solid var(--vp-c-divider);
  border-radius: 2px;
  transition: background-color 0.25s;
}
可以看到正確縮排了