使用CloudFlare R2作為部落格圖床
AI生成摘要
本文介紹如何使用CloudFlare R2作為部落格圖床,包括將圖片轉為webp格式、創建bucket、設定custom domain、使用rclone上傳圖片等步驟,並提供相關工具的安裝與配置指南。
本文主要以此文章作為參考
將圖片轉為webp
在正式上傳圖片之前先將圖片轉成webp
安裝webp
Mac
bash
brew install webpUbuntu
bash
sudo apt install webp將圖檔轉換成webp
指定png轉換成webp
bash
cwebp -q 80 input.png -o output.webp或是轉換整個資料夾內的png檔案 創建png_to_webp.sh
bash
#!/bin/bash

# Directory containing PNG files
input_dir=$1

# Quality for WebP conversion
quality=80

# Check if input directory is provided
if [ -z "$input_dir" ]; then
  echo "Usage: $0 <input_directory>"
  exit 1
fi

# Convert each PNG file in the directory to WebP
for file in "$input_dir"/*.png;
do
  if [ -f "$file" ]; then
    output_file="${file%.png}.webp"
    cwebp -q $quality "$file" -o "$output_file"
    echo "Converted $file to $output_file"
  fi
done
bash
chmod +x png_to_webp.sh
./png_to_webp.sh /path/to/png/files
開始使用CloudFlare R2
Prerequisite
- custom domain須先交由CloudFlare託管
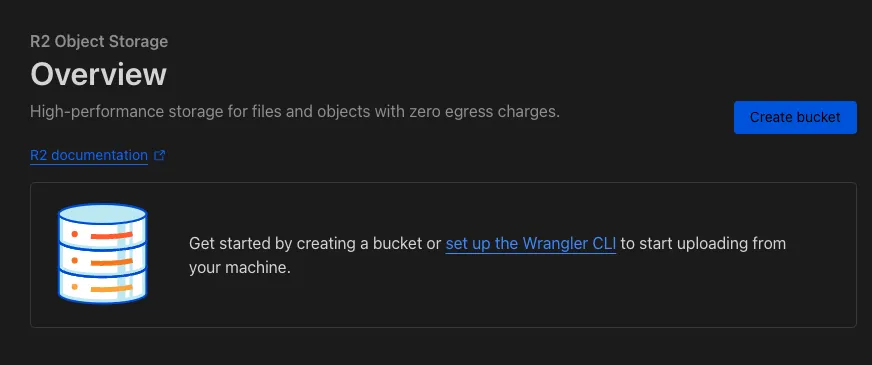
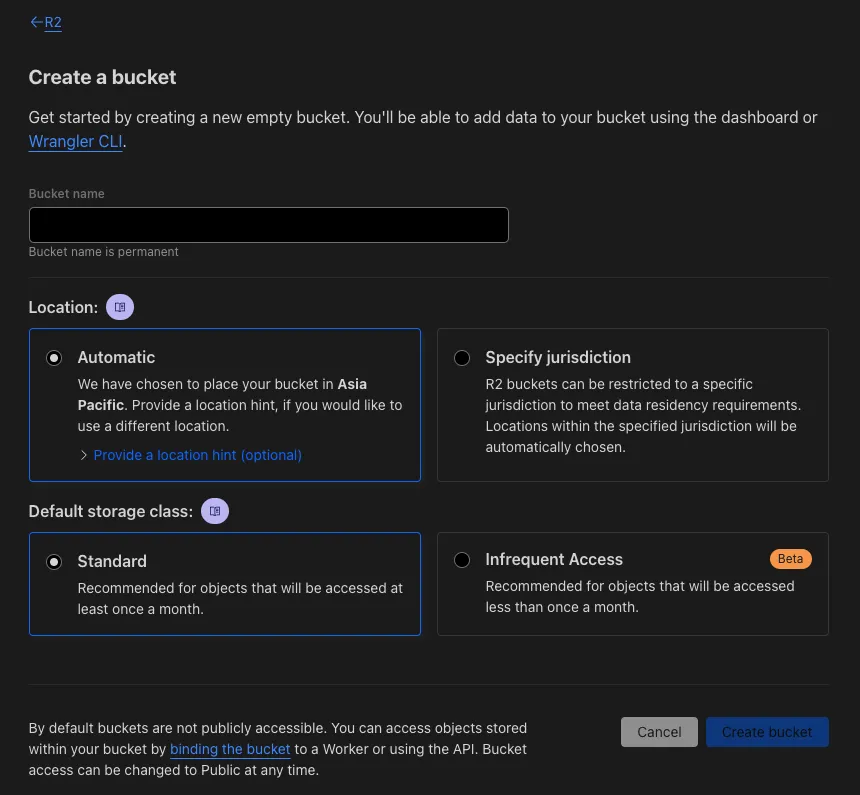
創立bucket
進入CloudFlare dashboard並從左側邊欄進入R2頁面
點選Create Bucket
輸入bucket name後建立新的bucket
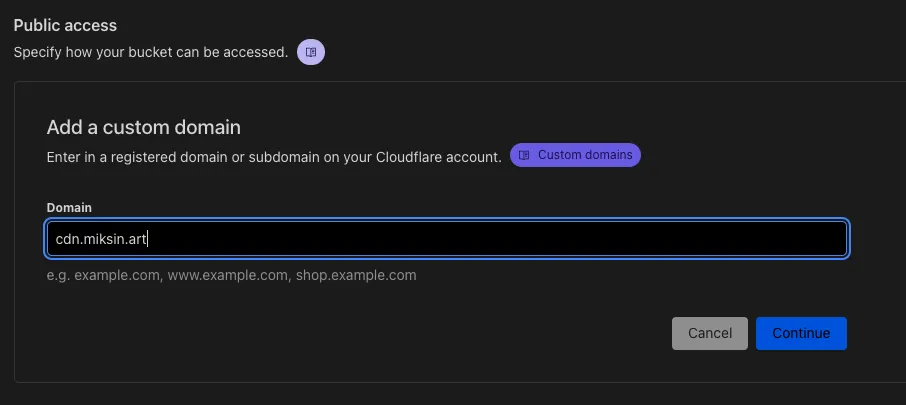
在設定中指定custom domain
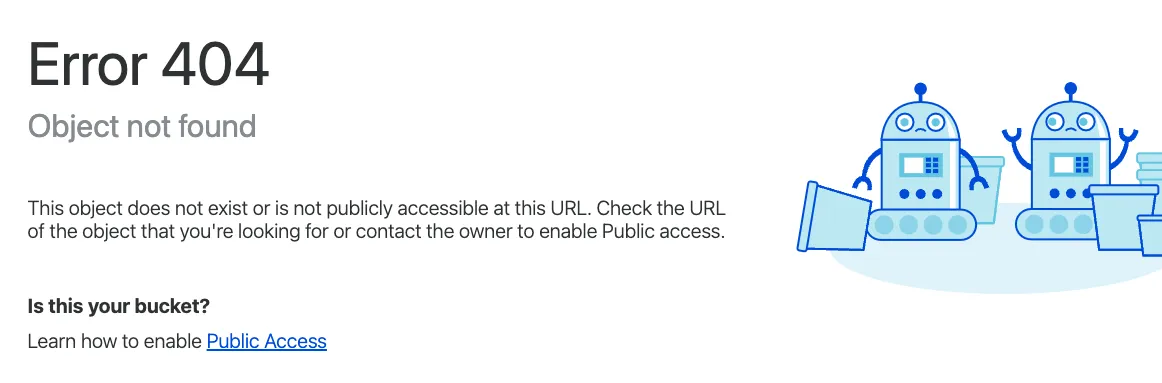
稍微等待後可以嘗試直接從瀏覽器access頁面 https://cdn.miksin.art/,若出現404是正常的,這設定表示成功了
使用rclone操作R2
雖然也可以用R2自己的網頁上傳檔案,但實在不太方便,連新增資料夾都作不到,因此使用rclone來操作
取得R2的API token
回到overview畫面右邊點選Manage R2 API Tokens並選擇Create API Token

進入設定頁面,選擇Object Read & Write
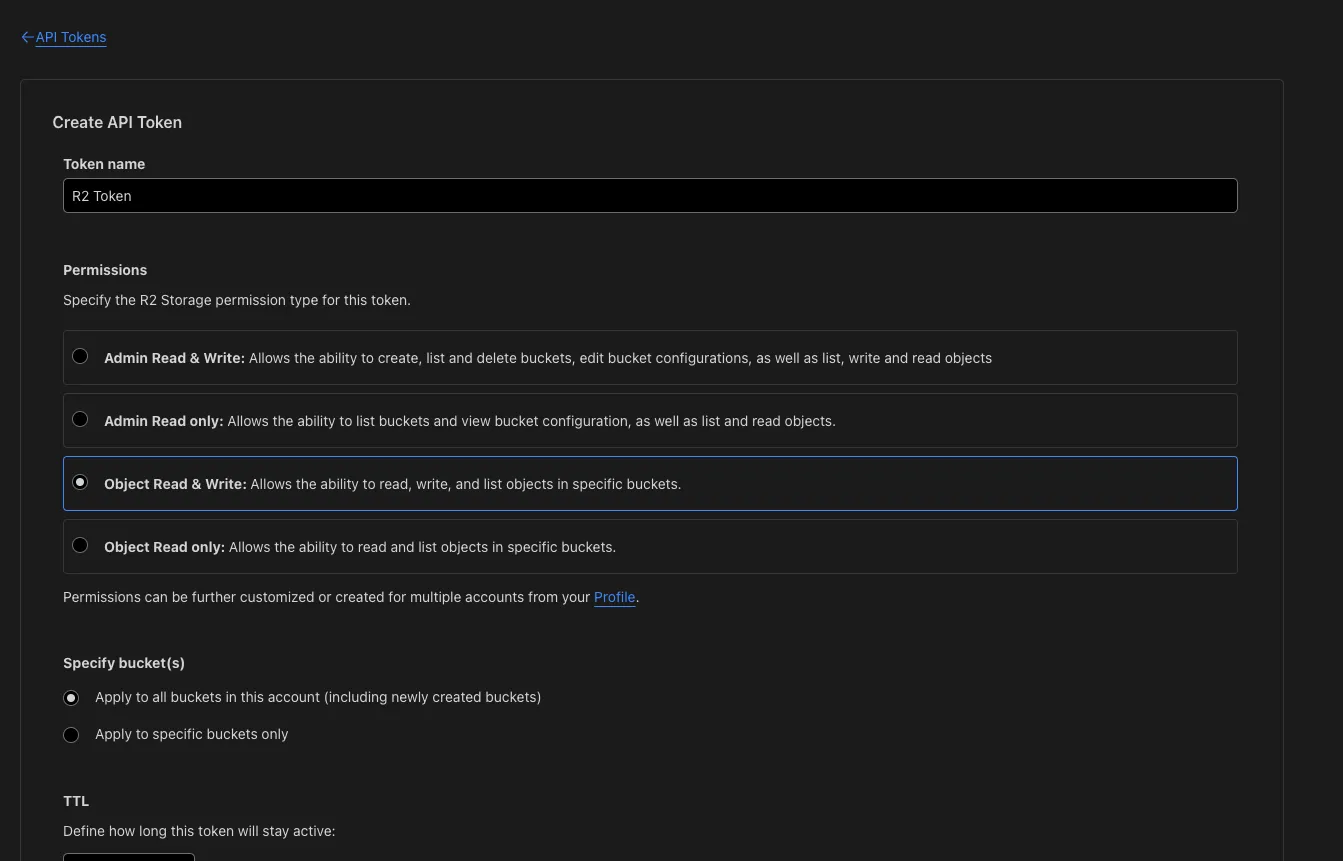
可以選擇操作全部bucket也可以指定只能操作特定bucketApply to specific buckets only
確定後會得到access key id等資訊,頁面先不要關掉,等下會用到
安裝rclone
Mac
bash
brew install rcloneUbuntu
參考官方安裝指示
Fetch and unpack
bash
curl -O https://downloads.rclone.org/rclone-current-linux-amd64.zip
unzip rclone-current-linux-amd64.zip
cd rclone-*-linux-amd64
Copy binary file
bash
sudo cp rclone /usr/bin/
sudo chown root:root /usr/bin/rclone
sudo chmod 755 /usr/bin/rclone
Install manpage
bash
sudo mkdir -p /usr/local/share/man/man1
sudo cp rclone.1 /usr/local/share/man/man1/
sudo mandb
設定rclone.conf
編輯~/.config/rclone/rclone.conf並將剛才從R2 API Token頁面得到的資訊填進去
[cloudflarer2]
type = s3
provider = Cloudflare
access_key_id =
secret_access_key =
endpoint =
acl = private
上傳圖片至特定路徑
將這個資料夾中的檔案都傳至本文圖片擺放位置/miksinote/img/notes/cloudflare/r2_img_hosting/
bash
rclone copy -v . cloudflarer2:/cdn/miksinote/img/notes/cloudflare/r2_img_hosting/可以ls確認看看結果
bash
rclone ls cloudflarer2:/cdn31806 miksinote/img/notes/cloudflare/r2_img_hosting/r2_api_permission.webp
25092 miksinote/img/notes/cloudflare/r2_img_hosting/r2_cdn_404.webp
39440 miksinote/img/notes/cloudflare/r2_img_hosting/r2_create_bucket.webp
11374 miksinote/img/notes/cloudflare/r2_img_hosting/r2_custom_domain.webp
9970 miksinote/img/notes/cloudflare/r2_img_hosting/r2_manage_api.webp然後就可以用剛才的路徑插入.md裡了
markdown
完成!