フォント
AI生成の要約
この記事では、VitePressでGoogleフォントを使用する方法を紹介します。フォントの選択、埋め込みコードの取得、VitePressのheadとCSSを設定して、言語設定に基づいて異なる主要フォントを設定する方法を含みます。
Googleフォントの使用
私は4つのフォントを使用しました:
- 英語 Inter
- 中国語 Noto Sans TC
- 日本語 Noto Sans JP
- モノスペース Noto Sans Mono
各ページでGet Fontをクリックします。
フォントを選択した後、Get embed codeをクリックします。

Embed code in the <head> of your htmlはVitePressに追加する部分です。
<link rel="preconnect" href="https://fonts.googleapis.com">
<link rel="preconnect" href="https://fonts.gstatic.com" crossorigin>
<link href="https://fonts.googleapis.com/css2?family=Inter:ital,opsz,wght@0,14..32,100..900;1,14..32,100..900&family=Noto+Sans+JP:[email protected]&family=Noto+Sans+Mono:[email protected]&family=Noto+Sans+TC:[email protected]&display=swap" rel="stylesheet"></link>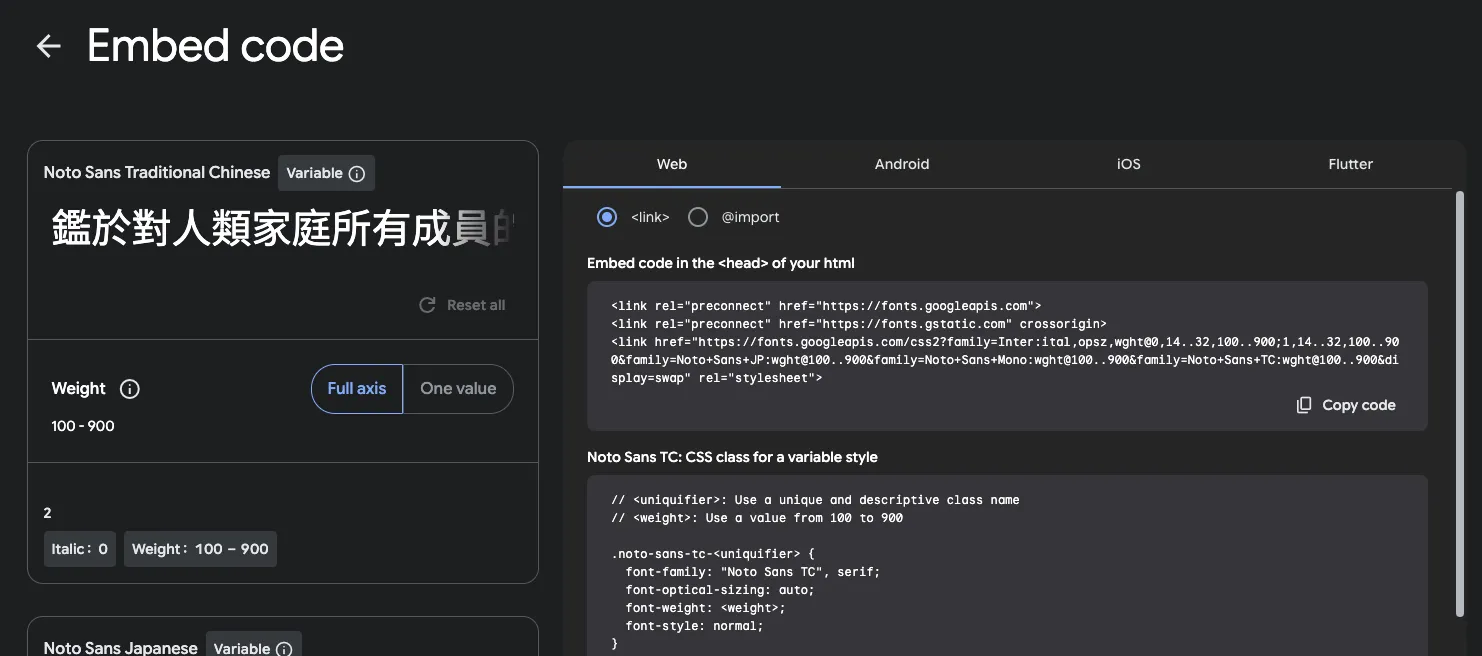
VitePressとの統合
headの設定
Googleフォントからコピーした部分を修正し、docs/.vitepress/config.mtsに追加します。
typescript
export default defineConfig({
  // ...
  head: [
    ["link", { rel: "preconnect", href: "https://fonts.googleapis.com" }],
    ["link", { rel: "preconnect", href: "https://fonts.gstatic.com", crossorigin: "" }],
    [
      "link",
      { href: "https://fonts.googleapis.com/css2?family=Inter:ital,opsz,wght@0,14..32,100..900;1,14..32,100..900&family=Noto+Sans+JP:[email protected]&family=Noto+Sans+Mono:[email protected]&family=Noto+Sans+TC:[email protected]&display=swap", rel: "stylesheet" },
    ],
  ],
  // ...
})
CSSの設定
docs/.vitepress/theme/style.cssを上書きします。
css
:root {
  --vp-font-family-base: var(--main-font-face, "Inter"), ui-sans-serif, system-ui, sans-serif, "Apple Color Emoji",
    "Segoe UI Emoji", "Segoe UI Symbol", "Noto Color Emoji";
  --vp-font-family-mono: "Noto Sans Mono", sans-serif;
}

html[lang="en-US"] {
  --main-font-face: "Inter";
}

html[lang="zh-TW"] {
  --main-font-face: "Noto Sans TC";
}

html[lang="ja-JP"] {
  --main-font-face: "Noto Sans JP";
}
主要フォントは言語に基づいて決定されます。言語切り替え設定は次の記事で記録します。
開発者ツールで確認し、成功しました!
